Xây dựng truy vấn bằng Laravel Query Builder
Bài viết được sự cho phép của tác giả Kien Dang Chung
Trong phần trước Làm việc với cơ sở dữ liệu trong Laravel bạn đã bắt đầu làm quen với việc thực hiện các câu truy vấn SQL dạng thô (raw SQL query), một khó khăn trong việc sử dụng các câu truy vấn này là việc truyền giá trị vào câu truy vấn. Các ứng dụng thực tế thường có các câu truy vấn rất phức tạp, nếu sử dụng raw SQL query sẽ rất khó khăn. Để giải quyết vấn đề này, Laravel đưa ra Laravel Query Builder giúp bạn có thể xây dựng bất kỳ câu truy vấn nào dù nó phức tạp đến đâu. Laravel Query Builder sử dụng PDO (PHP Data Object, hệ thống API có sẵn của PHP để kết nối đến các CSDL thông dụng), bản thân API PDO đã bảo vệ bạn trước các tấn công SQL Injection, do đó khi xử dụng Query Builder bạn không cần lo lắng xử lý dữ liệu trước khi chèn vào database.
Truy xuất dữ liệu từ database
Lấy toàn bộ các bản ghi từ một bảng
$users = DB::table('users')->get();Sử dụng phương thức table() để trả về một instance query builder của một bảng, khi đó muốn lấy tất cả các bản ghi sử dụng phương thức get(). Phương thức get() trả về Illuminate\Support\Collection với mỗi bản ghi là một đối tượng StdClass trong PHP.
Lấy một bản ghi hoặc một cột trong bảng
$user = DB::table('users')->where('name', 'FirebirD')->first();trả về một bản ghi, còn value() trả về một cột trong bảng
$email = DB::table('users')->where('name', 'FirebirD')->value('email');Lấy nhiều cột trong bảng
$users = DB::table('users')->pluck('id', 'name');

@foreach ($users as $id => $name)
    {{ $name }} có mã số là {{ $id }}
@endforeach
Lấy giá trị tổng hợp từ kết quả truy vấn
Laravel Query Builder hỗ trợ nhiều các phương thức tổng hợp như sau:
- min: giá trị nhỏ nhất
- max: giá trị lớn nhất
- avg: giá trị trung bình
- count: tổng số bản ghi
- sum: lấy tổng một trường nào đó của bảng.
$users = DB::table('users')->count();
$price = DB::table('orders')->max('price');
Các phương thức trong query builder
Select
select sử dụng để lựa chọn các cột trong một bảng:
$users = DB::table('users')->select('name', 'email as user_email')->get();distinct() sử dụng để lọc và trả về các kết quả không bị trùng lặp
$users = DB::table('users')->distinct()->get();Raw expression
Đôi khi bạn muốn có một thành phần của raw SQL query, có thể sử dụng DB::raw
$users = DB::table('users')
                     ->select(DB::raw('count(*) as user_count, status'))
                     ->where('status', '<>', 1)
                     ->groupBy('status')
                     ->get();
Mệnh đề where
Các mệnh đề where đơn giản với điều kiện =, >=, <=, <>, like
$users = DB::table('users')->where('votes', '=', 100)->get();
$users = DB::table('users')
                ->where('name', 'like', '%Kiên%')
                ->get();
Thậm chí có thể truyền một mảng điều kiện vào mệnh đề where
$users = DB::table('users')->where([
    ['active', '=', '1'],
    ['vote', '>', '50'],
    ['name', 'like', '%Kiên%'],
])->get();
Điều kiện trong một câu truy vấn có thể rất phức tạp khi kết hợp các mệnh đề where khác như: orWhere, whereBetween, whereNotBetween, whereIn, whereNotIn, whereNull, whereNotNull, whereDate, whereMonth, whereDay, whereYear, whereColumn, whereExist. Các ví dụ cho từng kiểu mệnh đề where như sau:
// Ví dụ về orWhere
$users = DB::table('users')
                    ->where('vote', '>', 50)
                    ->orWhere('comment', '>', 50)
                    ->get();
// Ví dụ về whereBetween
$users = DB::table('users')
                    ->whereBetween('age', [18, 35])->get();
// Ví dụ về whereIn
$users = DB::table('users')
                    ->whereIn('id', [1, 2, 3])
                    ->get();
// Ví dụ về whereNull
$users = DB::table('users')
                    ->whereNull('vote')
                    ->get();
// Ví dụ về whereDate
$users = DB::table('users')
                ->whereDate('join_date', '2017-03-27')
                ->get();
//Ví dụ về whereDay
$users = DB::table('users')
                ->whereDay('join_date', '27')
                ->get();
// Ví dụ về whereMonth
$users = DB::table('users')
                ->whereMonth('join_date', '03')
                ->get();
//Ví dụ về whereYear
$users = DB::table('users')
                ->whereYear('join_date', '2017')
                ->get();
//Ví dụ về whereColumn
$users = DB::table('account')
                ->whereColumn([
                    ['working_balance', '=', 'last_balance'],
                    ['updated_at', '>', 'created_at']
                ])->get();
// Ví dụ về whereExist
DB::table('users')
            ->whereExists(function ($query) {
                $query->select(DB::raw(1))
                      ->from('orders')
                      ->whereRaw('orders.user_id = users.id');
            })
            ->get();
// Ví dụ nhóm các điều kiện trong mệnh đề điều kiện
DB::table('users')
            ->where('name', '=', 'FirebirD')
            ->orWhere(function ($query) {
                $query->where('vote', '>', 50)
                      ->where('role', '<>', 'superadmin');
            })
            ->get();
Thao tác với kết quả trả về
Sắp xếp kết quả trả về của truy vấn bằng phương thức orderBy()
$users = DB::table('users')
                ->orderBy('vote', 'desc')
                ->get();
Lấy ngẫu nhiên một bản ghi
$randomUser = DB::table('users')
                ->inRandomOrder()
                ->first();
GroupBy và having:
$users = DB::table('users')
                ->groupBy('account_id')
                ->having('account_id', '>', 100)
                ->get();
Insert một hoặc nhiều bản ghi vào CSDL
// Insert một bản ghi
DB::table('users')->insert(
    ['name' => 'Nguyễn Văn A', 'email' => '[email protected]', 'votes' => 0]
);
// Insert nhiều bản ghi
DB::table('users')->insert([
    ['name' => 'Nguyễn Văn A', 'email' => '[email protected]', 'votes' => 0],
    ['name' => 'Nguyễn Văn B', 'email' => '[email protected]', 'votes' => 0],
    ['name' => 'Nguyễn Văn C', 'email' => '[email protected]', 'votes' => 0],
    ['name' => 'Nguyễn Văn D', 'email' => '[email protected]', 'votes' => 0],
]);
Có những trường hợp khi insert vào CSDL bạn cần lấy lại ID bản ghi để làm tham số cho các thao tác tiếp theo, sử dụng insertGetId
$user_id = DB::table('users')->insertGetId(
    ['name' => 'Nguyễn Văn A', 'email' => '[email protected]', 'votes' => 0]
);
echo 'User vừa đăng ký có id là' . $user_id;
Update dữ liệu trong CSDL
Sử dụng phương thức update(), ví dụ:
DB::table('users')
            ->whereYear('join_date', '2017')
            ->orWhere('vote', '>', 50)
            ->update(['generate_promote_code' => 1]);
Delete dữ liệu trong CSDL
DB::table('users')
              ->where('active', '=', 0)
              ->whereYear('join_date', '2015')
              ->delete();
Để xóa toàn bộ các bản ghi trong một bảng và thiết lập ID sinh tự động về 0 sử dụng lệnh truncate()
DB::table('users')->truncate();Ví dụ sử dụng Laravel Query Builder
Xây dựng một số trang phục vụ các việc sau nhập thông tin sản phẩm, quản lý danh sách sản phẩm: xóa sản phẩm, sửa sản phẩm… Chúng ta cùng bắt đầu thực hiện nào!
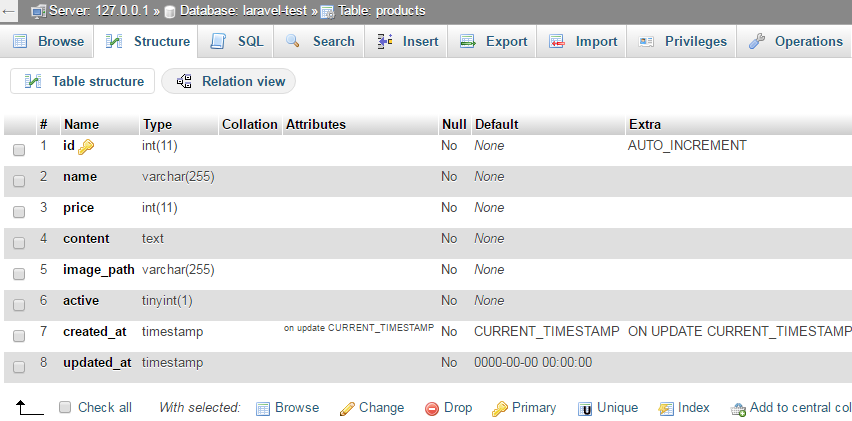
Bước 1: Tạo bảng products trong database laravel-test đã tạo trong bài Làm việc với cơ sở dữ liệu trong Laravel.
Bước 2: Tạo một controller tên là ProductController, sử dụng Restful Resource Controller.
c:\xampp\htdocs\laravel-test>php artisan make:controller ProductController --res
ource
Controller created successfully.
Bước 3: Thêm resource route vào routes/web.php
Route::resource('product', 'ProductController', ['only' => [
    'create', 'store', 'edit'
]]);
Bước 4: Xử lý từng hành động trên sản phẩm Bảng route tương ứng cho từng hành động như sau:
| Verb | URI | Action | Route Name |
|---|---|---|---|
| GET | /product |
index | product.index |
| GET | /product/create |
create | product.create |
| POST | /product |
store | product.store |
| GET | /product/{product_id} |
show | product.show |
| GET | /product/{product_id}/edit |
edit | product.edit |
| PUT/PATCH | /product/{product_id} |
update | product.update |
| DELETE | /product/{product_id} |
destroy | product.destroy |
Tạo mới sản phẩm:
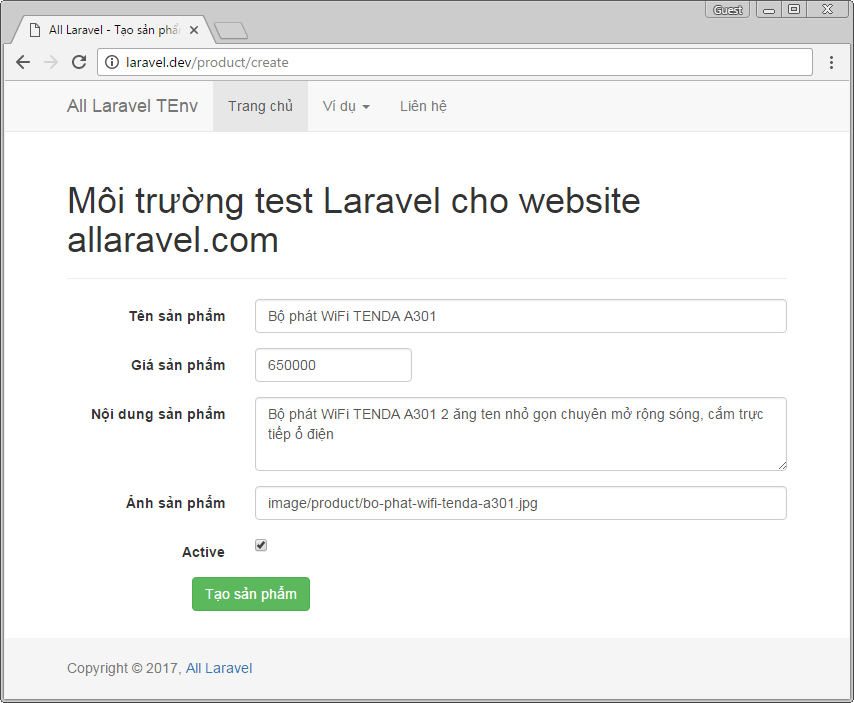
Tạo view create.blade.php trong resources/views/fontend/product
@extends('layouts.default')

@section('title', 'Tạo sản phẩm')

@section('content')
    @if(isset($success))
    <div class="alert alert-success" role="alert">{{ $success }}</div>
    @endif
    @if(isset($fail))
    <div class="alert alert-danger" role="alert">{{ $fail }}</div>
    @endif

    {!! Form::open(array('url' => '/product', 'class' => 'form-horizontal')) !!}
      <div class="form-group">
         {!! Form::label('name', 'Tên sản phẩm', array('class' => 'col-sm-3 control-label')) !!}
         <div class="col-sm-9">
            {!! Form::text('name', '', array('class' => 'form-control')) !!}
         </div>
      </div>

      <div class="form-group">
         {!! Form::label('price', 'Giá sản phẩm', array('class' => 'col-sm-3 control-label')) !!}
         <div class="col-sm-3">
            {!! Form::text('price', '', array('class' => 'form-control')) !!}
         </div>
      </div>

      <div class="form-group">
         {!! Form::label('content', 'Nội dung sản phẩm', array('class' => 'col-sm-3 control-label')) !!}
         <div class="col-sm-9">
            {!! Form::textarea('content', '', array('class' => 'form-control', 'rows' => 3)) !!}
         </div>
      </div>

      <div class="form-group">
         {!! Form::label('image_path', 'Ảnh sản phẩm', array('class' => 'col-sm-3 control-label')) !!}
         <div class="col-sm-9">
            {!! Form::text('content', '', array('class' => 'form-control')) !!}
         </div>
      </div>

      <div class="form-group">
         {!! Form::label('active', 'Active', array('class' => 'col-sm-3 control-label')) !!}
         <div class="col-sm-3">
            {!! Form::checkbox('active', '', true) !!}
         </div>
      </div>

      <div class="form-group">
         <div class="col-sm-offset-2 col-sm-10">
            {!! Form::submit('Tạo sản phẩm', array('class' => 'btn btn-success')) !!}
         </div>
      </div>
   {!! Form::close() !!}
@endsection
Thêm nội dung phương thức create trong ProductController
/**
 * Show the form for creating a new resource.
 *
 * @return \Illuminate\Http\Response
 */
public function create()
{
    return view('fontend.product.create');
}
Tiếp đến chúng ta xử lý insert sản phẩm vào CSDL, nó sẽ nằm trong phương thức store của ProductController (xem bảng các route của product)
/**
 * Store a newly created resource in storage.
 *
 * @param  \Illuminate\Http\Request  $request
 * @return \Illuminate\Http\Response
 */
public function store(Request $request)
{
    $validator = Validator::make($request->all(), [
        'name'       => 'required|max:255',
        'price'      => 'required|number',
        'content'    => 'required',
        'image_path' => 'required'
    ]);

    if ($validator->fails()) {
        return redirect('product/create')
                ->withErrors($validator)
                ->withInput();
    } else {
        // Lưu thông tin vào database, phần này sẽ giới thiệu ở bài về database
        $active = $request->has('active')? 1 : 0;
        $product_id = DB::table('product')->insertGetId(
            'name'       => $request->input('name'),
            'price'      => $request->input('price'),
            'content'    => $request->input('content'),
            'image_path' => $request->input('image_path'),
            'active'     => $active
            );
        return redirect('product/create')
                ->with('message', 'Sản phẩm được tạo thành công với ID: ' . $product_id);
    }
}
Để nhập sản phẩm ta vào đường dẫn http://laravel.dev/product/create
Danh sách sản phẩm:
Danh sách sản phẩm sẽ được xử lý trong phương thức index của ProductController, chúng ta thêm nội dung cho phương thức này như sau:
/**
 * Display a listing of the resource.
 *
 * @return \Illuminate\Http\Response
 */
public function index()
{
    $products = DB::table('products')->get();
    return view('fontend.product.list')->with($products);
}
Tiếp đến chúng ta tạo một view để hiển thị danh sách sản phẩm tên là list.blade.php nằm trong thư mục resources/views/fontend/product
@extends('layouts.default')
@section('title', 'Danh sách sản phẩm')
@section('content')
<table class="table table-bordered">
<tr class="success">
<th>ID</th>
<th>Tên sản phẩm</th>
<th>Giá sản phẩm</th>
<th>Nội dung</th>
<th>Ảnh sản phẩm</th>
<th>Đăng bán</th>
<th>Action</th>
</tr>
@foreach($products as $p)
<tr>
<td>{{ $p->id }}</td>
<td>{{ $p->name }}</td>
<td class="text-right">{{ number_format($p->price) }}</td>
<td>{{ $p->content }}</td>
<td>
<img src="{{ Asset($p->image_path) }}" alt="{{ $p->name }}" width="120" height="120">
</td>
<td>
@if($p->active)
<span class="text-success glyphicon glyphicon-ok"></span>
@else
<span class="text-danger glyphicon glyphicon-remove"></span>
@endif
</td>
<td>
<a href="{{ '/product/' . $p->id . '/edit'}}"><span class="glyphicon glyphicon-pencil">Edit</span></a>
<a href="{{ '/product/' . $p->id }}"><span class="glyphicon glyphicon-trash">Delete</span></a>
</td>
</tr>
@endforeach
</table>
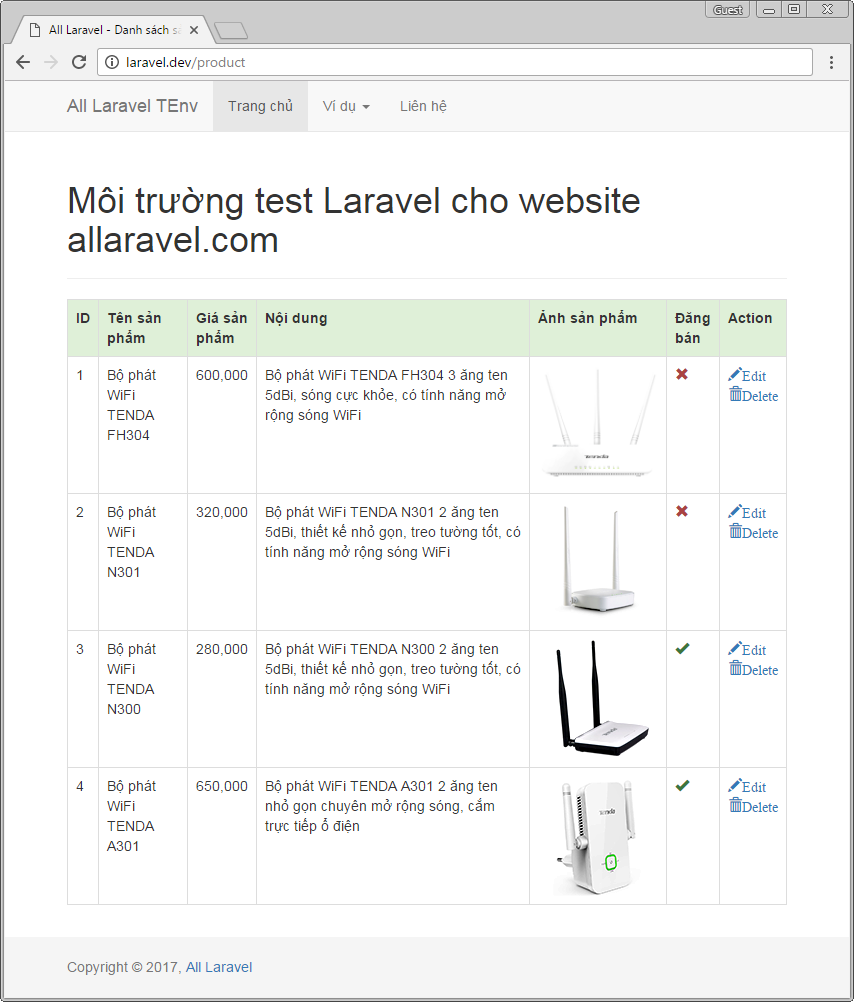
@endsectionKết quả khi chạy http://laravel.dev/product ta có danh sách các sản phẩm
Chỉnh sửa sản phẩm
Chúng ta sử dụng phương thức edit() trong ProductController để chỉnh sửa sản phẩm, nội dung phương thức này như sau:
 /**
 * Show the form for editing the specified resource.
 *
 * @param  int  $id
 * @return \Illuminate\Http\Response
 */
public function edit($id)
{
    $product = DB::table('products')->find($id);
    return view('fontend.product.edit')->with(compact('product'));
}
Tạo một view để chỉnh sửa sản phẩm resources/views/fontend/product/edit.blade.php với nội dung như sau:
@extends('layouts.default')

@section('title', 'Chỉnh sửa sản phẩm')

@section('content')
    @if(isset($success))
    <div class="alert alert-success" role="alert">{{ $success }}</div>
    @endif
    @if (count($errors) > 0)
        <div class="alert alert-danger">
            <ul>
                @foreach ($errors->all() as $error)
                    <li>{{ $error }}</li>
                @endforeach
            </ul>
        </div>
    @endif

    {!! Form::open(array('url' => '/product/' . $product->id, 'class' => 'form-horizontal', 'method' => 'put')) !!}
      <div class="form-group">
         {!! Form::label('name', 'Tên sản phẩm', array('class' => 'col-sm-3 control-label')) !!}
         <div class="col-sm-9">
            {!! Form::text('name', $product->name, array('class' => 'form-control')) !!}
         </div>
      </div>

      <div class="form-group">
         {!! Form::label('price', 'Giá sản phẩm', array('class' => 'col-sm-3 control-label')) !!}
         <div class="col-sm-3">
            {!! Form::text('price', $product->price, array('class' => 'form-control')) !!}
         </div>
      </div>

      <div class="form-group">
         {!! Form::label('content', 'Nội dung sản phẩm', array('class' => 'col-sm-3 control-label')) !!}
         <div class="col-sm-9">
            {!! Form::textarea('content', $product->content, array('class' => 'form-control', 'rows' => 3)) !!}
         </div>
      </div>

      <div class="form-group">
         {!! Form::label('image_path', 'Ảnh sản phẩm', array('class' => 'col-sm-3 control-label')) !!}
         <div class="col-sm-9">
            {!! Form::text('image_path', $product->image_path, array('class' => 'form-control')) !!}
         </div>
      </div>

      <div class="form-group">
         {!! Form::label('active', 'Active', array('class' => 'col-sm-3 control-label')) !!}
         <div class="col-sm-3">
            {!! Form::checkbox('active', $product->active, true) !!}
         </div>
      </div>

      <div class="form-group">
         <div class="col-sm-offset-2 col-sm-10">
            {!! Form::submit('Chỉnh sửa sản phẩm', array('class' => 'btn btn-success')) !!}
         </div>
      </div>
   {!! Form::close() !!}
@endsection
Phương thức update() của ProductController đảm nhận phần cập nhật nội dung sản phẩm, thêm code vào phương thức này như sau:
/**
* Update the specified resource in storage.
*
* @param \Illuminate\Http\Request $request
* @param int $id
* @return \Illuminate\Http\Response
*/
public function update(Request $request, $id)
{
$active = $request->has('active')? 1 : 0;
$updated = DB::table('products')
->where('id', '=', $id)
->update([
'name' => $request->input('name'),
'price' => $request->input('price'),
'content' => $request->input('content'),
'image_path' => $request->input('image_path'),
'active' => $active,
'updated_at' => \Carbon\Carbon::now()
]);
return Redirect::back()
->with('message', 'Cập nhật sản phẩm thành công')
->withInput();
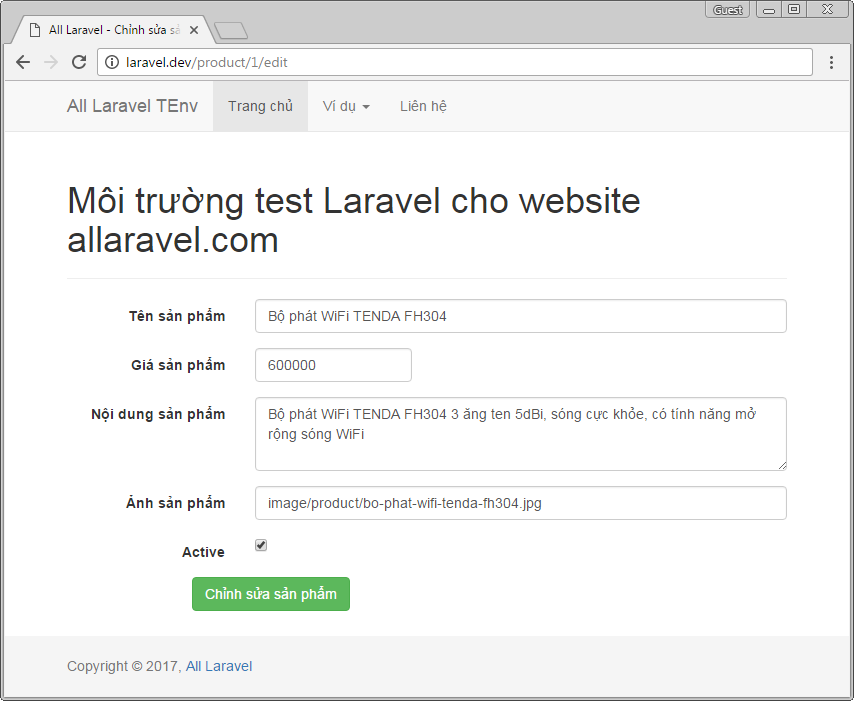
}OK, giờ chúng ta click vào Edit sản phẩm bất kỳ trong danh sách sản phẩm nó sẽ xuất hiện cửa sổ chỉnh sửa sản phẩm
Thay đổi thông tin và click Chỉnh sửa sản phẩm, sau đó vào lại trang danh sách sản phẩm http://laravel.dev/product chúng ta sẽ thấy nội dung đã thay đổi. Xóa một sản phẩm Thông thường các sản phẩm khi đã nhập vào hệ thống chúng ta sẽ không xóa đi mà chỉ cần không active nó lên là ok, do vậy phần này mình bỏ qua nhé, với lại cũng hơi lười tí.
Lời kết
Laravel Query Builder giúp chúng ta xây dựng ứng dụng thật nhanh chóng cho dù các câu truy vấn có phức tạp đến đâu chúng ta cũng xử lý rất dễ dàng. Trong ví dụ phần ảnh sản phẩm tôi tạm thời để theo kiểu copy bằng tay đường dẫn ảnh sản phẩm. Trong thời gian tới, khi nào rảnh tôi sẽ hướng dẫn bạn tích hợp CKEditor và CKFinder vào hệ thống giúp đưa vào nội dung phong phú vào và quản lý lựa chọn tài nguyên như ảnh, file dễ dàng hơn.
Bài viết gốc được đăng tải tại allaravel.com
Có thể bạn quan tâm:
- Xây dựng cụm cơ sở dữ liệu bằng MongoDB ( Building Database Clusters with MongoDB )
- Laravel 5.5 và Reactjs: Xây dựng CRUD (Create, Read, Update, Delete) từ đầu
- Laravel view xây dựng logic trong giao diện
Xem thêm tuyển dụng laravel developer hấp dẫn trên TopDev
- T Thoughtworks: Nơi công nghệ chạm đích đến
- Đ Đại dương xanh cho Doanh nghiệp tăng trưởng bền vững trên Zalo
- L Lakehouse Architecture: Nền tảng dữ liệu cho ứng dụng AI trong tương lai
- G Giải Quyết Bài Toán Kinh Doanh Bằng Big Data và AI
- B BenQ RD Series – Dòng Màn Hình Lập Trình 4k+ Đầu Tiên Trên Thế Giới
- F Framework nào tốt nhất cho dự án của bạn? – Checklist chi tiết
- K Kinh nghiệm xử lý responsive table hiệu quả
- S Stackoverflow là gì? Bí kíp tận dụng Stack Overflow hiệu quả
- 7 7 kinh nghiệm hữu ích khi làm việc với GIT trong dự án
- B Bài tập Python từ cơ bản đến nâng cao (có lời giải)