Bài viết được sự cho phép của tác giả Nguyễn Hữu Khanh
WebSocket là một trong các loại Socket, nói nôm na cho các bạn dễ hình dung về WebSocket thì nó giúp chúng ta có thể tạo kết nối 2 chiều giữa server side và client side trong một web application bất kỳ. Một khi kết nối đã được thiết lập thì client và server có thể trao đổi các thông tin với nhau, client có thể gửi message cho server và ngược lại server cũng vậy. Khác với HTTP connection thì chỉ có client mới có thể gửi request tới server, server trả về response, server không thể tự gửi message tới bất kỳ client nào. WebSocket thường được sử dụng trong các ứng dụng web đòi hỏi tính realtime của một chức năng nào đó. Trong bài viết này, mình sẽ hướng dẫn các bạn cách hiện thực WebSocket trong một web application với Spring framework các bạn nhé!
Đầu tiên, mình sẽ tạo mới một Spring Boot project:
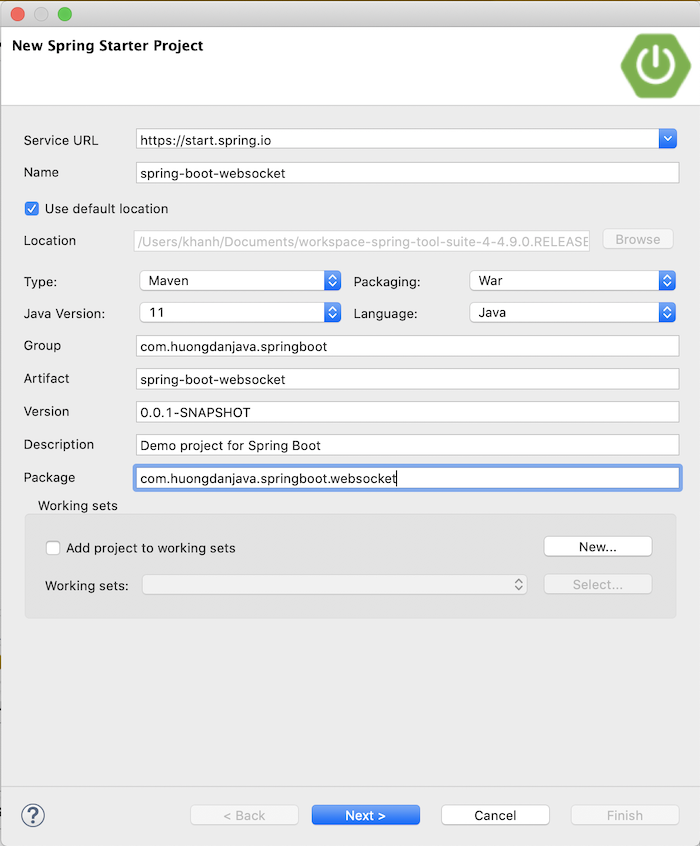
với Web và WebSocket dependency như sau:
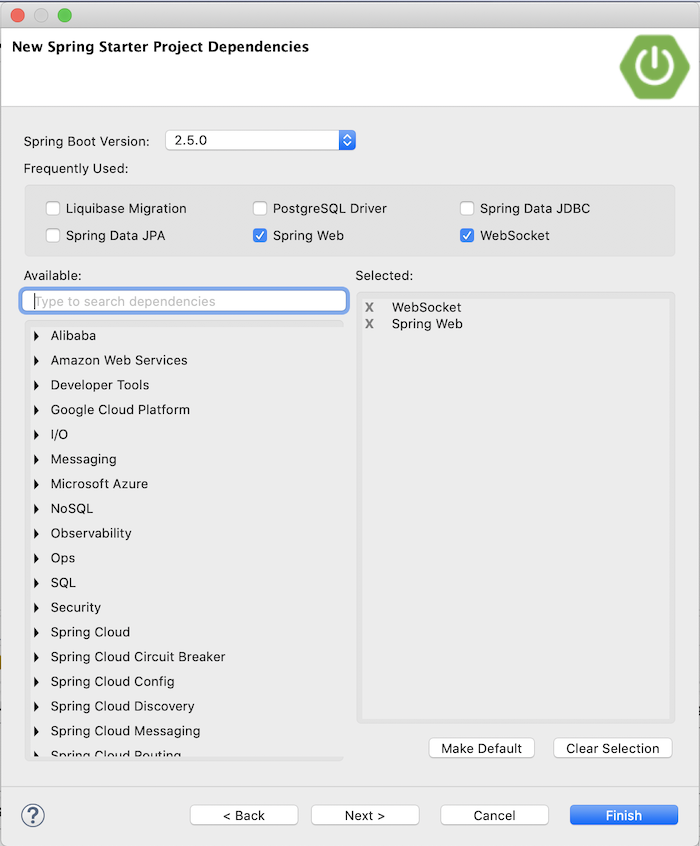
để làm ví dụ.
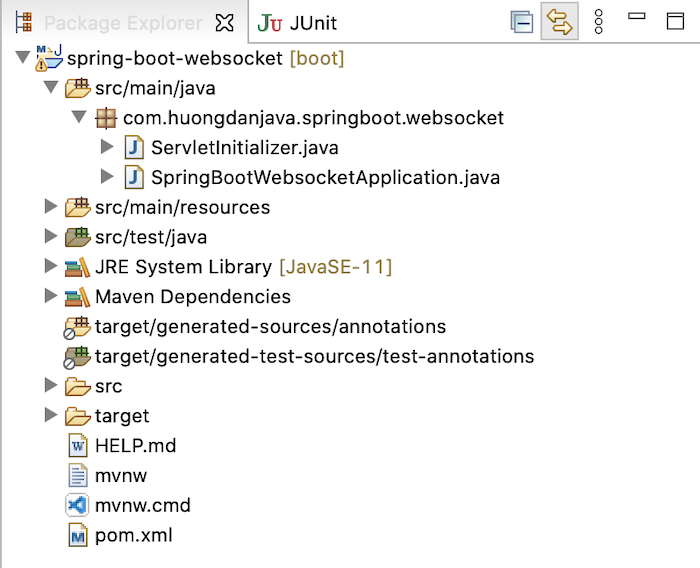
Kết quả:
Tạo mới WebSocket server
Để khởi tạo WebSocket server với Spring WebSocket, trước tiên, các bạn cần phải nắm một số khái niệm như sau:
Đầu tiên là về Message Broker, nó là một message-oriented middleware server đứng ở giữa để delivery message từ các request tới các topic theo cơ chế pub-sub hoặc queue theo cơ chế point-to-point. Có nghĩa là thay vì các application gửi thẳng message tới topic hoặc queue mà các bạn thường thấy khi làm việc với Message Queue thì với Message Broker, các message phải đi qua Message Broker này. Spring sử dụng Message Broker để hiện thực WebSocket behind the sense đó các bạn!
Cái thứ hai là mình sẽ nói về STOMP. STOMP là gì? Nó là viết tắt của từ Streaming Text Oriented Messaging Protocol, dịch ra thì STOMP là một giao thức tin nhắn hướng văn bản, được sử dụng để client và server sau khi đã connect được với nhau, sử dụng để trao đổi thông tin. Spring cũng hỗ trợ giao thức này trong việc truyền thông tin giữa client và server với WebSocket đó các bạn.
OK, giờ chúng ta sẽ khai báo để tạo mới một WebSocket server các bạn nhé!
Các bạn cần tạo mới một class để cấu hình cho WebSocket. Class này sẽ implement interface WebSocketMessageBrokerConfigurer và được annotate với annotation @EnableWebSocketMessageBroker nha các bạn:
package com.huongdanjava.springboot.websocket;

import org.springframework.context.annotation.Configuration;
import org.springframework.web.socket.config.annotation.EnableWebSocketMessageBroker;
import org.springframework.web.socket.config.annotation.WebSocketMessageBrokerConfigurer;

@Configuration
@EnableWebSocketMessageBroker
public class WebSocketConfiguration implements WebSocketMessageBrokerConfigurer {

}
Tất nhiên, là nó cũng cần được annotate với annotation @Configuration để Spring Boot tự động scan nữa!
Có 2 phương thức mà chúng ta cần implement trong class WebSocketConfiguration này là configureMessageBroker() và registerStompEndpoints(). Phương thức configureMessageBroker() với tham số là class MessageBrokerRegistry cho phép chúng ta có thể cấu hình Message Broker với phương thức enableSimpleBroker():
@Override
public void configureMessageBroker(MessageBrokerRegistry registry) {
registry.enableSimpleBroker("/topic");
registry.setApplicationDestinationPrefixes("/app");
}
Tham số của phương thức enableSimpleBroker() là tên endpoint để các client có thể subscribe và nhận message từ server.
Trong phương thức configureMessageBroker() trên, mình cũng sử dụng thêm phương thức setApplicationDestinationPrefixes() để định nghĩa prefix cho các destination mà client sẽ gửi message tới WebSocker server. Các bạn nếu đã làm việc với RESTful Web Service sử dụng Spring MVC thì có thể hình dung mục đích của phương thức này giống như các bạn định nghĩa một request mapping trong Controller ở class level. Những method định nghĩa các request URL sẽ có prefix là value của request mapping này.
Phương thức registerStompEndpoints() với tham số là class StompEndpointRegistry thì cũng giống như khi định nghĩa các request URL trong RESTful Web Service, giúp chúng ta định nghĩa những endpoint mà client sẽ sử dụng để gọi và kết nối tới WebSocket. Chúng ta sử dụng phương thức addEndpoint() của class StompEndpointRegistry để thêm các endpoint mà các bạn muốn. Ví dụ mình định nghĩa một endpoint như sau:
@Override
public void registerStompEndpoints(StompEndpointRegistry registry) {
registry.addEndpoint("/hello");
}
Một số trình duyệt có thể sẽ không hỗ trợ WebSocket connection ví dụ như chế độ ẩn danh của trình duyệt Chrome chẳng hạn. Trong trường hợp này, các bạn có thể gọi thêm method withSockJS() để sử dụng các giải pháp thay thế khác như xhr-streaming, xhr-polling thay vì kết nối WebSocket mặc định.
Nội dung class WebSocketConfiguration của mình lúc này như sau:
package com.huongdanjava.springboot.websocket;

import org.springframework.context.annotation.Configuration;
import org.springframework.messaging.simp.config.MessageBrokerRegistry;
import org.springframework.web.socket.config.annotation.EnableWebSocketMessageBroker;
import org.springframework.web.socket.config.annotation.StompEndpointRegistry;
import org.springframework.web.socket.config.annotation.WebSocketMessageBrokerConfigurer;

@Configuration
@EnableWebSocketMessageBroker
public class WebSocketConfiguration implements WebSocketMessageBrokerConfigurer {

@Override
public void registerStompEndpoints(StompEndpointRegistry registry) {
registry.addEndpoint("/hello").withSockJS();
}

@Override
public void configureMessageBroker(MessageBrokerRegistry registry) {
registry.enableSimpleBroker("/topic");
registry.setApplicationDestinationPrefixes("/app");
}
}
Để handle message từ client gửi tới endpoint mà chúng ta vừa mới configure ở trên “/hello”, các bạn có thể tạo mới một controller MessageController với nội dung như sau:
package com.huongdanjava.springboot.websocket;

import org.springframework.messaging.handler.annotation.MessageMapping;
import org.springframework.messaging.handler.annotation.SendTo;
import org.springframework.stereotype.Controller;

@Controller
public class MessageController {

@MessageMapping("/hello")
@SendTo("/topic/messages")
public String send(String username) {
return "Hello, " + username;
}
}
Giống như controller trong Spring MVC, các bạn có thể annotate class handle message từ client với annotation @Controller nhưng thay vì sử dụng annotation @RequestMapping trong method handle message, chúng ta sử dụng annotation @MessageMapping với value là giá trị của endpoint mà chúng ta đã cấu hình trong class WebSocketConfiguration, ví dụ của mình là “/hello”.
Sau khi method xử lý business logic và trả về kết quả, kết quả này sẽ được gửi tới destination mà client đã subscribe, được khai báo trong annotation @SendTo.
Bây giờ, nếu các bạn chạy ứng dụng, xem log message, các bạn sẽ thấy WebSocket server sẽ start và sẵn sàng nhận kết nối từ phía client như sau:
. ____ _ __ _ _
/\\ / ___'_ __ _ _(_)_ __ __ _ \ \ \ \
( ( )\___ | '_ | '_| | '_ \/ _` | \ \ \ \
\\/ ___)| |_)| | | | | || (_| | ) ) ) )
' |____| .__|_| |_|_| |_\__, | / / / /
=========|_|==============|___/=/_/_/_/
:: Spring Boot :: (v2.5.0)

2021-06-05 11:36:45.108 INFO 38061 --- [ main] c.h.s.w.SpringBootWebsocketApplication : Starting SpringBootWebsocketApplication using Java 15.0.1 on Khanhs-MBP with PID 38061 (/Users/khanh/Documents/workspace-spring-tool-suite-4-4.9.0.RELEASE/spring-boot-websocket/target/classes started by khanh in /Users/khanh/Documents/workspace-spring-tool-suite-4-4.9.0.RELEASE/spring-boot-websocket)
2021-06-05 11:36:45.110 INFO 38061 --- [ main] c.h.s.w.SpringBootWebsocketApplication : No active profile set, falling back to default profiles: default
2021-06-05 11:36:46.683 INFO 38061 --- [ main] o.s.b.w.embedded.tomcat.TomcatWebServer : Tomcat initialized with port(s): 8080 (http)
2021-06-05 11:36:46.694 INFO 38061 --- [ main] o.apache.catalina.core.StandardService : Starting service [Tomcat]
2021-06-05 11:36:46.694 INFO 38061 --- [ main] org.apache.catalina.core.StandardEngine : Starting Servlet engine: [Apache Tomcat/9.0.46]
2021-06-05 11:36:46.860 INFO 38061 --- [ main] o.a.c.c.C.[Tomcat].[localhost].[/] : Initializing Spring embedded WebApplicationContext
2021-06-05 11:36:46.860 INFO 38061 --- [ main] w.s.c.ServletWebServerApplicationContext : Root WebApplicationContext: initialization completed in 1609 ms
2021-06-05 11:36:47.306 INFO 38061 --- [ main] o.s.b.w.embedded.tomcat.TomcatWebServer : Tomcat started on port(s): 8080 (http) with context path ''
2021-06-05 11:36:47.307 INFO 38061 --- [ main] o.s.m.s.b.SimpleBrokerMessageHandler : Starting...
2021-06-05 11:36:47.307 INFO 38061 --- [ main] o.s.m.s.b.SimpleBrokerMessageHandler : BrokerAvailabilityEvent[available=true, SimpleBrokerMessageHandler [org.springframework.messaging.simp.broker.DefaultSubscriptionRegistry@6a1ef65c]]
2021-06-05 11:36:47.308 INFO 38061 --- [ main] o.s.m.s.b.SimpleBrokerMessageHandler : Started.
2021-06-05 11:36:47.319 INFO 38061 --- [ main] c.h.s.w.SpringBootWebsocketApplication : Started SpringBootWebsocketApplication in 2.769 seconds (JVM running for 3.982)
2021-06-05 11:36:47.320 INFO 38061 --- [ main] o.s.b.a.ApplicationAvailabilityBean : Application availability state LivenessState changed to CORRECT
2021-06-05 11:36:47.321 INFO 38061 --- [ main] o.s.b.a.ApplicationAvailabilityBean : Application availability state ReadinessState changed to ACCEPTING_TRAFFIC
2021-06-05 11:37:47.023 INFO 38061 --- [MessageBroker-1] o.s.w.s.c.WebSocketMessageBrokerStats : WebSocketSession[0 current WS(0)-HttpStream(0)-HttpPoll(0), 0 total, 0 closed abnormally (0 connect failure, 0 send limit, 0 transport error)], stompSubProtocol[processed CONNECT(0)-CONNECTED(0)-DISCONNECT(0)], stompBrokerRelay[null], inboundChannel[pool size = 0, active threads = 0, queued tasks = 0, completed tasks = 0], outboundChannel[pool size = 0, active threads = 0, queued tasks = 0, completed tasks = 0], sockJsScheduler[pool size = 1, active threads = 1, queued tasks = 0, completed tasks = 0]
Tiếp theo, chúng ta sẽ code phần client để xem WebSocket hoạt động như thế nào nhé các bạn!
Tạo mới client kết nối tới WebSocket server
Mình sẽ viết code HTML, JavaScript để giả lập việc gửi message từ client tới server, và cả việc server gửi message tới client như thế nào.
Mình sẽ sử dụng WebJars để thêm JQuery, SocketJS client và Stomp WebSocket dependencies như sau:
<dependency>
<groupId>org.webjars</groupId>
<artifactId>webjars-locator-core</artifactId>
</dependency>
<dependency>
<groupId>org.webjars.npm</groupId>
<artifactId>jquery</artifactId>
<version>3.6.0</version>
</dependency>
<dependency>
<groupId>org.webjars</groupId>
<artifactId>sockjs-client</artifactId>
<version>1.5.1</version>
</dependency>
<dependency>
<groupId>org.webjars</groupId>
<artifactId>stomp-websocket</artifactId>
<version>2.3.4</version>
</dependency>
JQuery dùng để viết code Javascript dễ dàng hơn, SockJS để làm việc với WebSocket connection còn Stomp WebSocket thì để chúng ta làm việc với STOMP message đó các bạn!
Mình sẽ tạo mới một trang HTML cho phép chúng ta nhập tên user, nhấn nút gửi tới WebSocket server, và một nơi để hiển thị kết quả trả về từ WebSocket server.
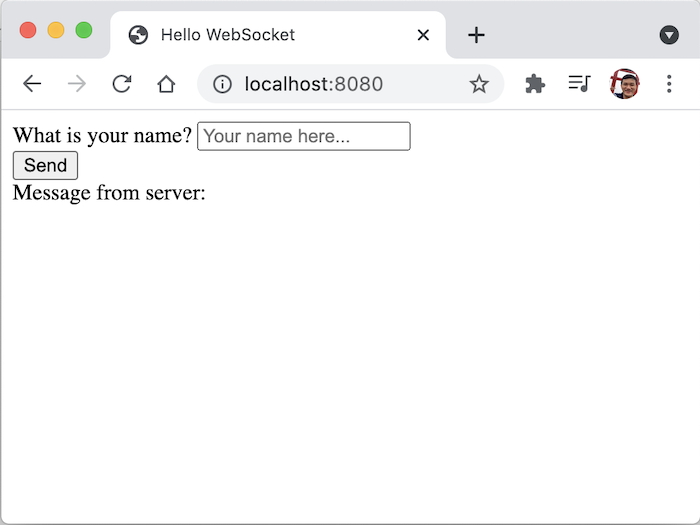
Nội dung của tập tin index.html trong thư mục src/main/resources/static như sau:
<!DOCTYPE html>
<html>
<head>
<title>Hello WebSocket</title>
<script src="/webjars/jquery/dist/jquery.min.js"></script>
<script src="/webjars/sockjs-client/sockjs.min.js"></script>
<script src="/webjars/stomp-websocket/stomp.min.js"></script>
<script src="/app.js"></script>
</head>
<body>
<div id="main-content">
<div>
<form>
<div>
<label>What is your name?</label>
<input type="text" id="name" placeholder="Your name here...">
</div>
<button id="send" type="submit">Send</button>
</form>
</div>
</div>
<div>
<label>Message from server: </label><span id="message"></span>
</div>
</body>
</html>
Tập tin app.js cũng trong thư mục src/main/resources/static có nội dung như sau:
var stompClient = null;

$(document).ready(function() {
connect();
});

function connect() {
var socket = new SockJS('/hello');
stompClient = Stomp.over(socket);
stompClient.connect({}, function() {
console.log('Web Socket is connected');
stompClient.subscribe('/topic/messages', function(message) {
$("#message").text(message.body);
});
});
}

$(function() {
$("form").on('submit', function(e) {
e.preventDefault();
});
$("#send").click(function() {
stompClient.send("/app/hello", {}, $("#name").val());
});
});
Nếu các bạn biết một chút về JQuery thì sẽ hiểu code của mình có nghĩa là: khi browser đã load nội dung của trang index.html, web của mình sẽ tự động connect tới WebSocket server sử dụng thư viện SockJS client và sử dụng thư viện Stomp WebSocket để gửi STOMP message. Đối tượng Stomp Client sẽ subscribe vào “/topic/messages” để nhận message từ WebSocket server.
Stomp Client cho phép chúng ta có thể gửi một STOMP message tới WebSocket server sử dụng endpoint “/app/hello” với giá trị chúng ta nhập trong textbox.
Mỗi khi nhận message từ WebSocket server thì giá trị trong phần body của STOMP message này sẽ được hiển thị.
Kết quả khi mình chạy ứng dụng, nhập Khanh vào textbox và nhấn nút Send như sau:
